 |
| The shiny wood paneling reflected everything. This looks great in person, but can be difficult to accurately photograph. |
The materials in the room ranged from dark glossy wood paneling and tile to flat white linen and shiny chrome vases. I knew that I would not be able to capture the extreme latitude of the room with a single exposure, so I planned to find the best angle and then lock the scene down on my tripod.
To complicate things, there were at least five different light sources with their own color temperature…. blue daylight, green fluorescents, yellow tungstens, white LEDs and my flashes. Each light source was affecting colors and creating pools of localized color zones.
 |
| There were large areas of white in this room which were easily affected by colors of the different light sources. |
Since I could not simply gel my flash to match all the light temperatures, I ended up shooting each part of the scene separately and composting them later. This allowed me to expose for highlights, midtones and shadows to create a high-dynamic range photo while controlling the color casts. This also allowed me to combine the bright scene outside the window with the relatively dark interior… impossible to do in one shot.
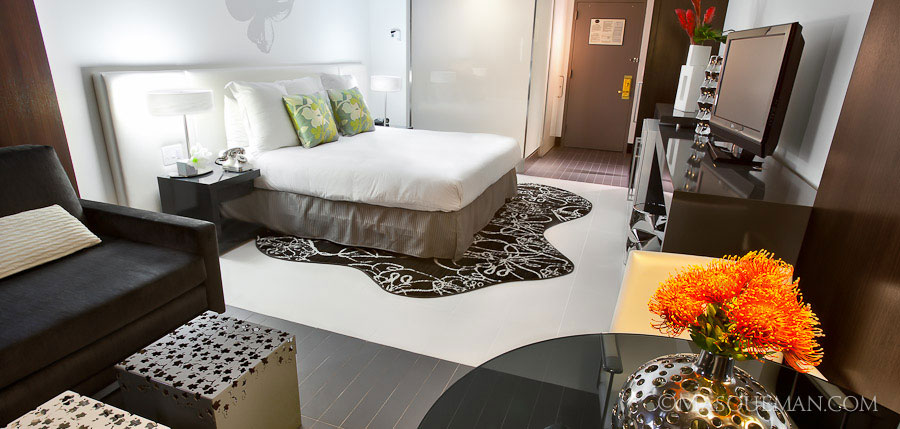
When lighting rooms with flash, try not to overpower ambient light sources that give the room its character. In the photo above, I shot a flash through the frosted glass shower wall which is a key feature of the room’s swanky design. You can see they spent a lot of money on custom glass walls in the restroom.

I also took photos of the room next door which was more of a standard hotel room. It’s pretty interesting to see the difference between the two. This room had the gauze-like sheer curtain that would have helped tame the other room’s extreme lighting conditions. Oh well.

The last shot looks easy, but it was difficult to hide the flashes while lighting both rooms. Again, the shiny materials revealed all light sources so I had to be sneaky where I put my lighting.


